Found a dust-covered violin in an attic? Perhaps it even has a label mentioning a famous violin maker. You can, of course, take it to a violin workshop near you to have it examined, but there are also solutions available on the Internet. These can be found both in violin shops and in auction houses. You will often be asked to send measurements of the instrument, together with good-quality photos. Here's a guide on how to measure your violin and what information is important to the violin maker.
Tools for measuring your instrument
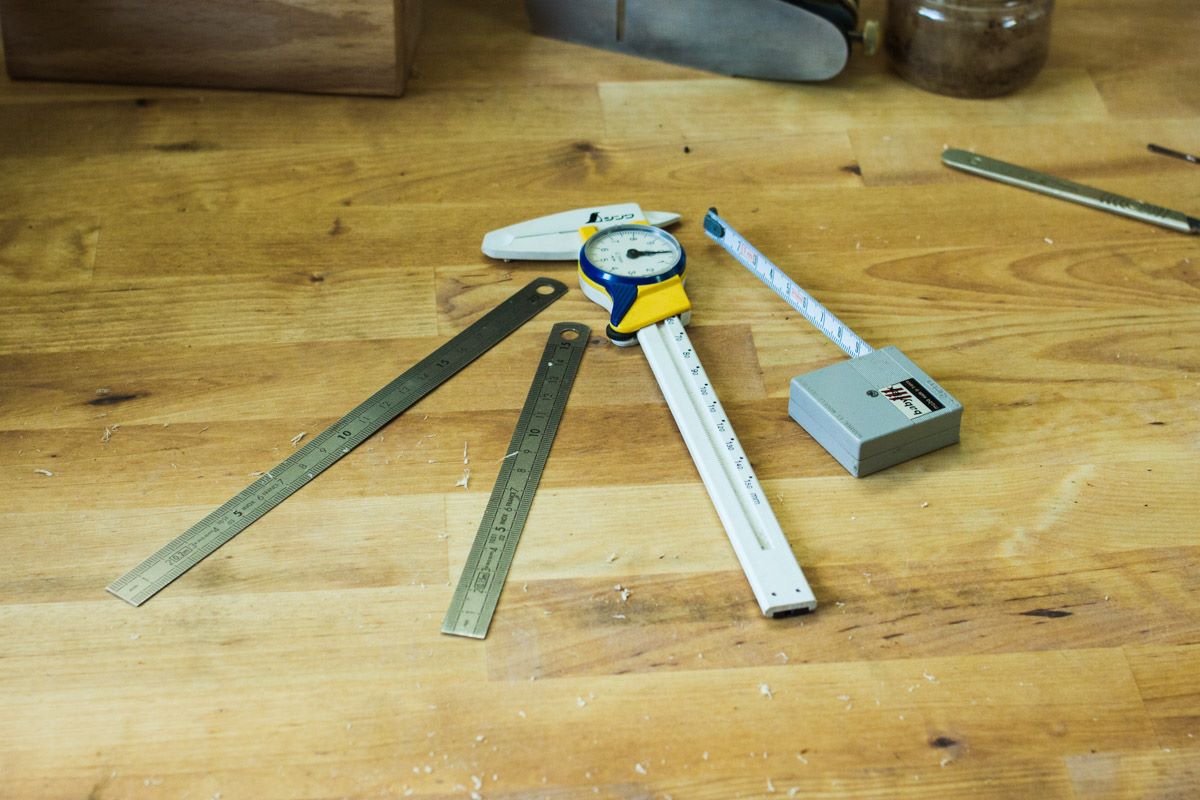
Although making or assembling a violin may require many specialized measuring tools. You don't need to own them all to take the basic measurements yourself. But here are the tools you' ll need to learn how to measure your violin!
Two straight rules
[pullquote align="right"]
In lutherie, a millimeter ruler is all you need. The eye does the rest of the work and, with a little practice, can achieve precision to the tenth or even the hundredth.
[/pullquote]
Rulers graduated in millimeters are needed for most operations. Theoretically, they can even be used for all operations if they are long enough.
Here are a few tips for choosing your rules:
- It's best to have a metal ruler that's straight and not too flexible. However, a wooden or plastic model could also work very well, and avoid damaging the varnish or the instrument.
- It's best if the zero point of the scale starts directly on the edge of the ruler, as this makes for a more accurate reading.
Tape measure or scroller
A tape measure is very useful for measuring the various parts of the resonance box. However, it will be difficult to assess the vibrating length or elevation with them.
How to measure your violin?
Knowing the measurements of a violin provides a great deal of information about its condition, its sound potential and its origin. That's why you'll often be asked to provide them, along with photos, if you want to request an online appraisal or expertise.
In any case, there's nothing complicated about it: just take the measuring instruments I've described above and a sheet of paper. In just a few minutes, you'll know all the important measurements to send to your luthier.
How to measure the instrument body
Body length
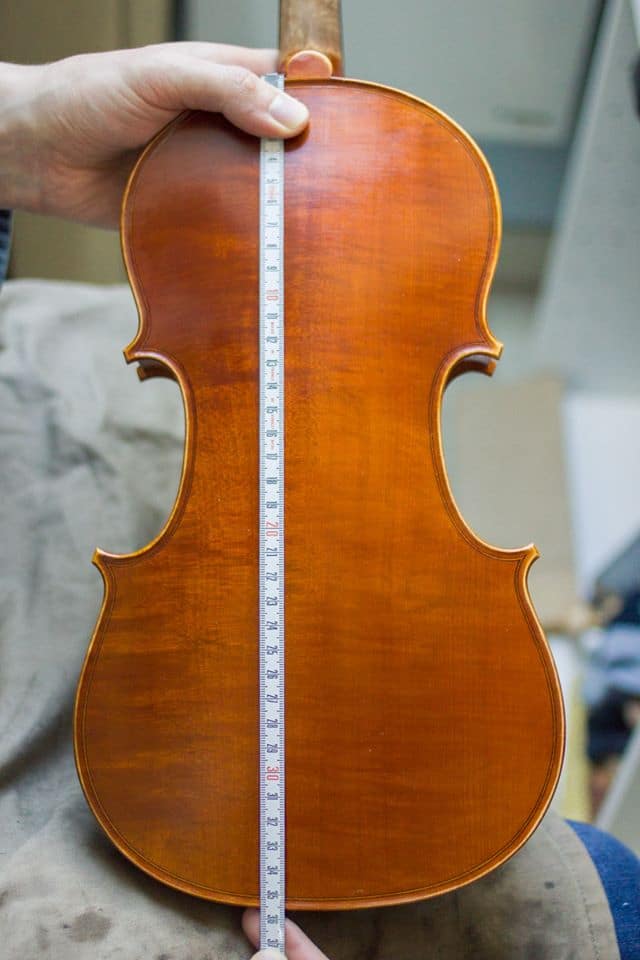
Knowing the length of the body allows you to immediately identify the size of an instrument. This makes it easy to determine who it's for and what the instrument is capable of. What's more, it will have an immediate effect on its value, as a 3/4 violin will always be less sought-after than a full violin.
Similarly, variations in this length can be used to determine a luthier's period of manufacture or geographical area of production.
The body of the instrument is always measured on the bottom of the violin,viola or cello. In this way, the fingerboard, bridge, tailpiece and anything else on the table are not in the way. Theoretically, you should be able to measure the exact distance between the two points furthest apart in length, but without counting the button.
This imprecise measurement would be constantly open to interpretation, so by convention we measure from the junction of the edges between the knob and the bottom. We then aim for the middle of the opposite side to measure body length.
The gesture is easier to grasp if you look at the photo(click on it to enlarge).
However, if your bottom is in one piece or it's obvious that the joint is not centered. You can try aiming for the joint in the ribs. If there isn't one, you'll have to figure out how to measure your violin accurately...
Which size fits my instrument?
| Instrument | 4/4 | 3/4 | 1/2 | 1/4 | 1/8 | 1/16 |
|---|---|---|---|---|---|---|
| Violin | 356 | 335 | 310 | 280 | 255 | 230 |
| Alto | 380 and more | 356 | 335 | 310 | 280 | 255 |
| Cello | 755 | 690 | 650 | 580 | 530 | 455 |
All lengths are given in millimetres and represent an order of magnitude on current instruments.
Body width
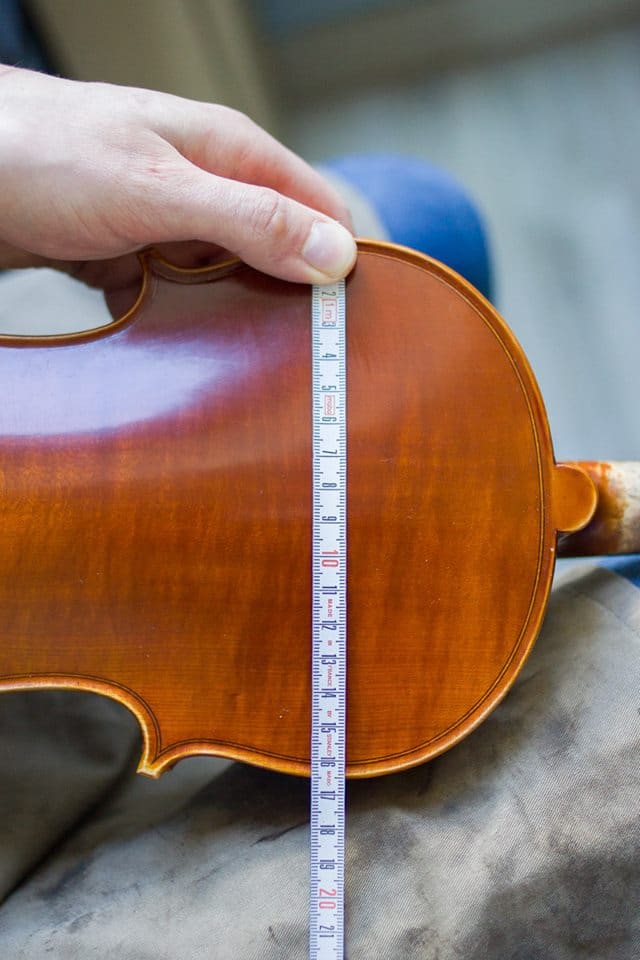
Knowing the width of the various parts of a violin, viola or cello will very often enable you toanticipate its character. Used in conjunction with photographs, they will enable the attentive examiner tohypothesize about the model or maker.
There are three important measurements to be made at various heights in the background:
- Top
- Center
- Bottom
The upper part corresponds to the symmetrical curves that meet at the knob and continue with the neck. This measurement is taken perpendicular to the centerline at the point where the widths are greatest.
The central part is located between the four corners. In this case, measure the smallest distance between the two curves.
The bottom part is measured in exactly the same way as the top part.
On very old instruments whose edges have been damaged or deformed, it is possible to measure the distance between the outside of the purfling and thenadd to this the margin separating the purfling from the edge on an intact part of the instrument. This is to approximate the original size. But in most cases, you can just roughly estimate the missing part.
How to measure vibrating length
Vibrating length can be measured indirectly, even on a stringless instrument. For this, we consider two elements:
- Distance from top edge to bridge(195mm on a full-size violin)
- The distance between the top edge and the nut(130mm on a whole violin)
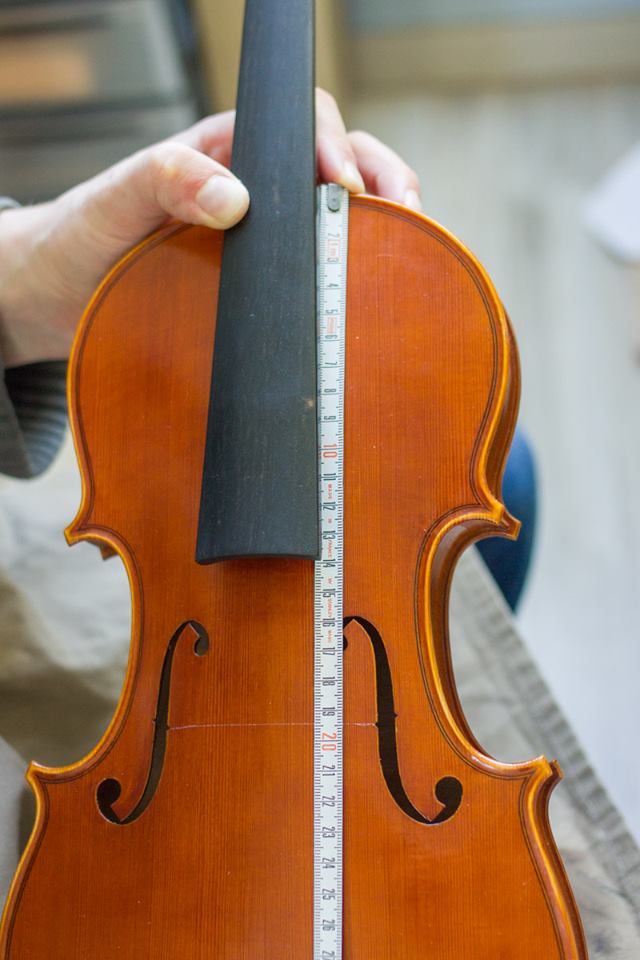
Click to enlarge images
These measurements will enable the luthier to determine whether the instrument can be built to current standards. If not, modifications to the neck may be required.
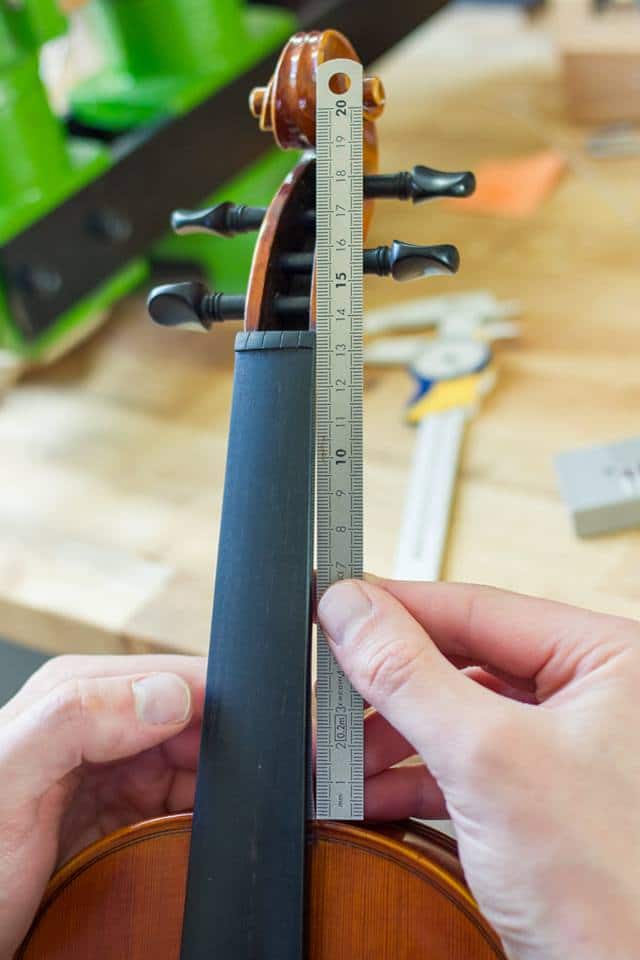
How to measure the elevation of my violin
Theelevation of the instrument is in fact the projection of the fingerboard up to the bridge. This measurement is crucial, as it has a direct impact on the angle at which the strings will touch the bridge, and will therefore totally define the balance of the violin, viola or cello.
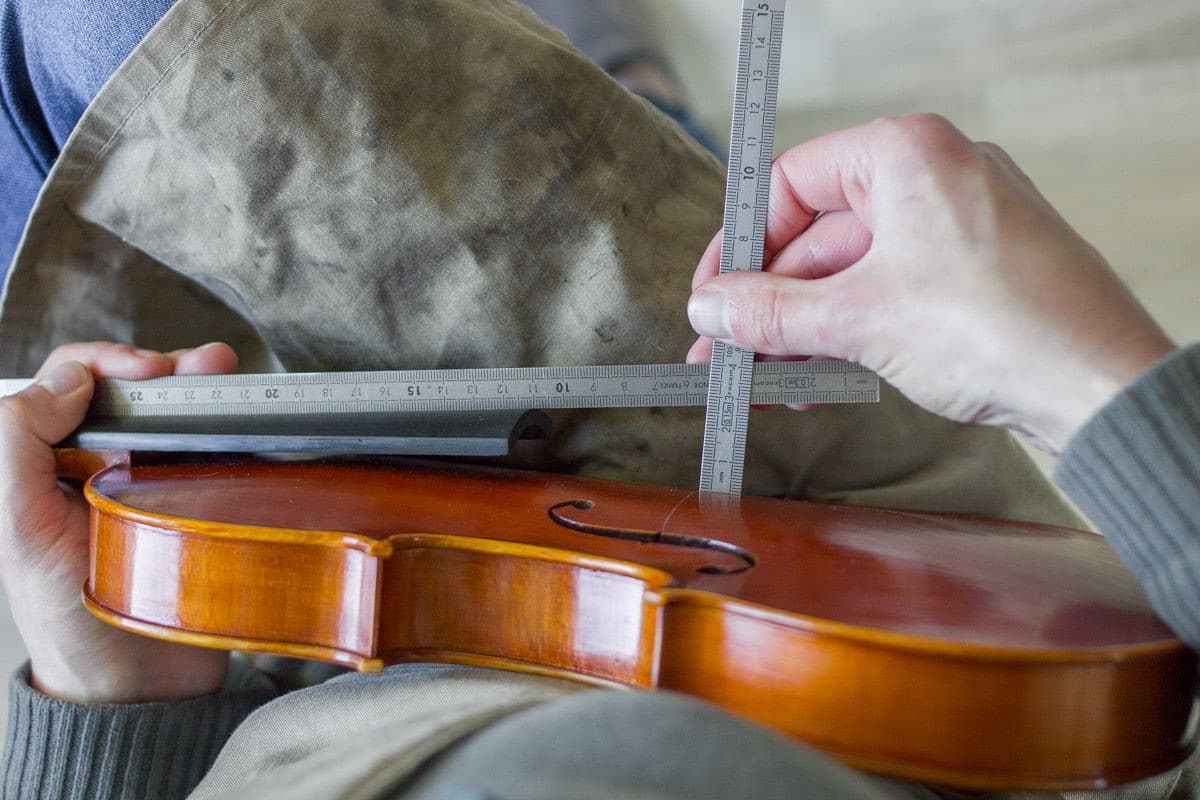
To measure the elevation, you'll need two rulers, positioned as shown in the photo.
The first, which should be fairly long and rigid, should be positioned well in the middle of the fingerboard and should simulate its extension. The second should be placed at right angles to an imaginary line that connects the inner stings of each fingerboard. Then simply read off the height at which the two rulers meet(in the photo, 27 millimetres).
What elevation for my instrument?
| Instrument | 4/4 | 3/4 | 1/2 | 1/4 | 1/8 | 1/16 |
|---|---|---|---|---|---|---|
| Violin | 27 | 25 | 24 | 22 | 20 | 19 |
| Alto | 30 and over | 27 | 25 | 24 | 22 | 20 |
| Cello | 81 | 75 | 69 | 63 | 58 | - |
Now you know everything you need to know about measuring your violin!
Get an opinion on your instrument
Once you know how to measure your violin, you still need to be able to take good photos. That's another subject I'll be tackling in the future, but in the meantime here are a few guidelines on the most important shots:
- The entire front table, close enough
- Same front background as for the table
- A 3/4 view to get an idea of the splints
- The scroll on at least one side, comprising the pegbox and part of the handle.
- The pegbox, the part where the strings are stretched so that the scroll can also be seen.
- But also any other information that could be used to draw up an estimate(damage, apparent defect, special detail, etc.).
- Finally, there's no point in trying to take a photo of the label, as photos are generally very poor and don't really provide any information. You can, however, describe it in your message.
In any case, you can send me what you've got and I'll give you my opinion on the condition or value of your violin, viola or cello.