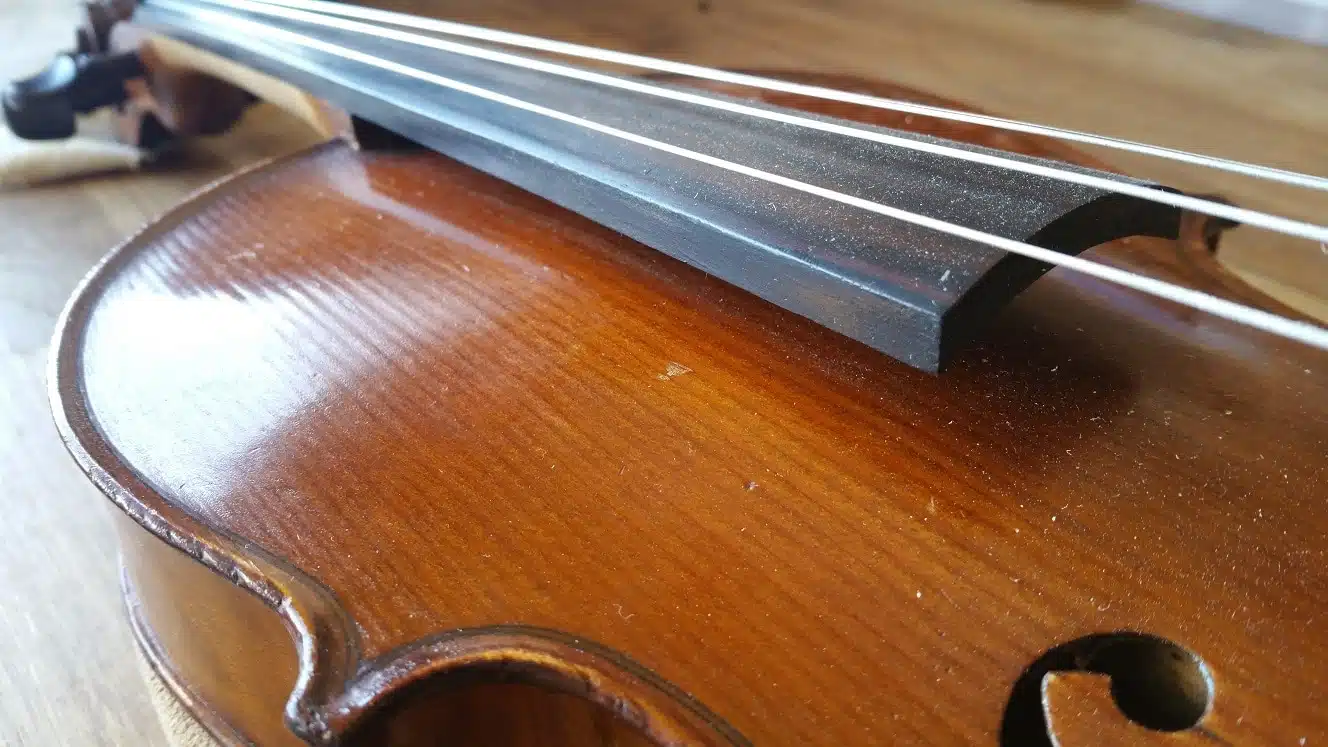
Il y a quelques jours de cela, je suis tombé sur la publication d’une professeure de violon. Dans celle-ci, elle relatait notamment les difficultés qu’elle avait eu à accorder l’instrument de son élève. De même, elle joignait la photo en guise d’explication et c’est ainsi que je me suis rendu compte du désastre (vous pourrez voir celle-ci plus bas). C’est pourquoi j’ai décidé de créer un guide du montage de corde pour violon afin d’aider les débutants à monter correctement leurs cordes. Une vidéo explicative plus bas dans l’article !
Guide du montage de corde pour violon
Grâce à ce guide, je vais vous transmettre les méthodes simples et efficaces qui vont vous permettre d’installer vous-même vos cordes de manière parfaite. Bien sûr, cela nécessitera sans doute un peu de pratique, mais vous verrez qu’avec un peu de méthode, il n’y a vraiment rien de compliqué.
Aussi, je vais essayer de faire dans ce guide la part des choses. Effectivement, cette opération sera plus ou moins difficile en fonction de l’attention qui a été portée à votre instrument à la base. De ce fait, un chevillier et des chevilles parfaitement formées et entretenues fonctionneront toujours mieux que d’autres. Mais il s’agira plutôt ici de vous donner les moyens de faire au mieux quelle que soit la situation.
Les erreurs à ne pas commettre
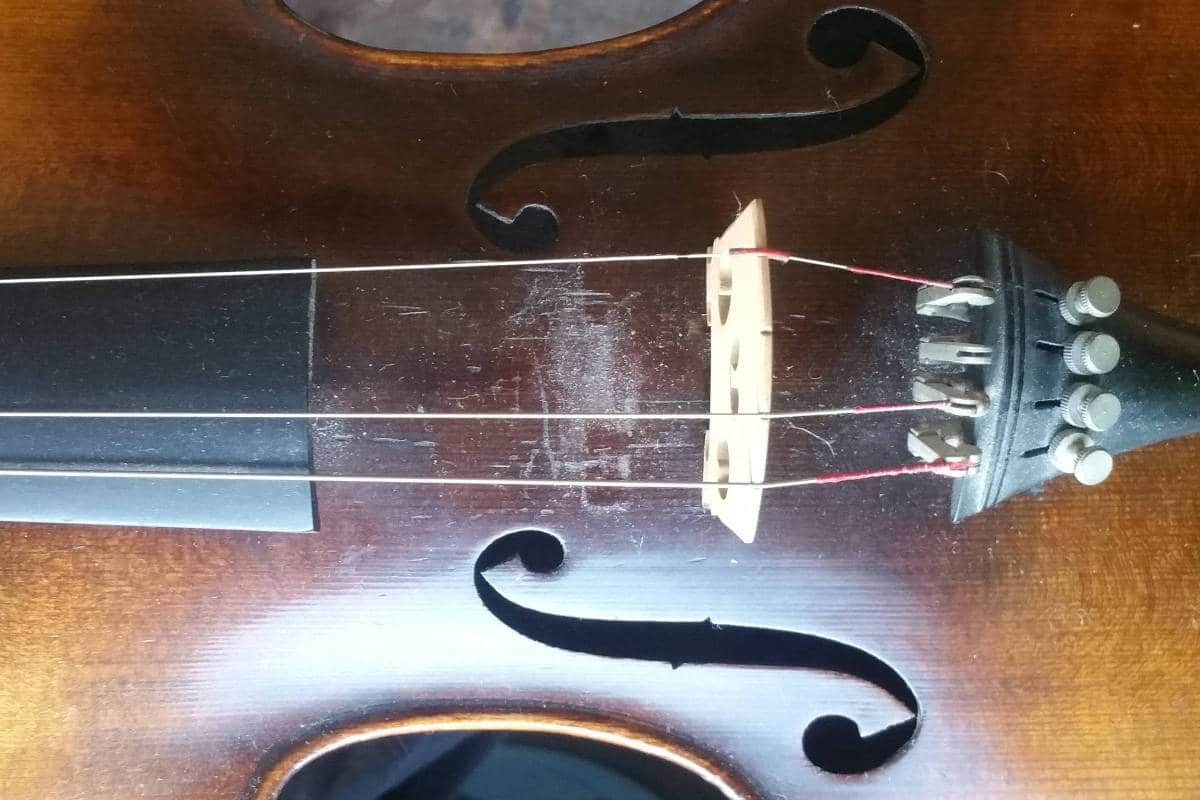
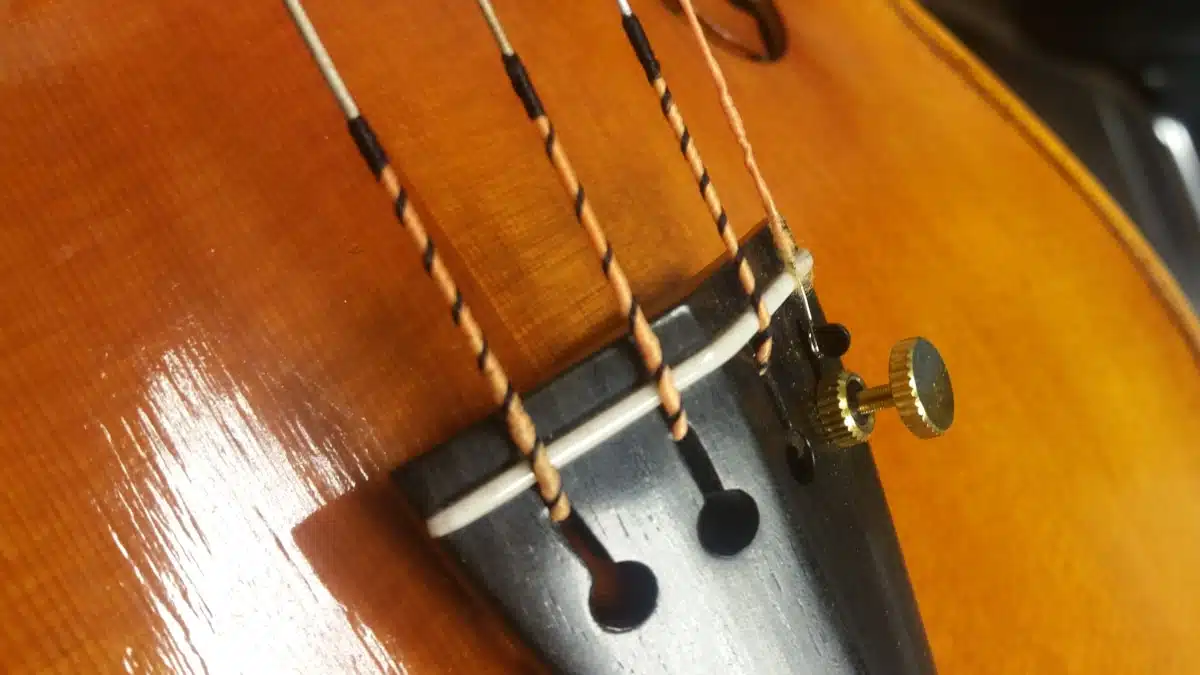
Tout d’abord, nous allons observer la photo suivante afin de déterminer ce qui ne va pas en termes d’installation de cordes sur les chevilles de ce violon.
Les cordes vont dans le mauvais sens.
En effet, comme nous pouvons l’observer sur la photo,celles-ci passent sous les chevilles. Cela a plusieurs effets négatifs :
- Augmentation de la tension, ce qui augmentera de manière significative la casse des cordes (sans parler du changement du son et de l’imprécision d’accordage).
- Frottements indésirables, sur le sillet mais aussi sur les chevilles. En effet, puisque les cordes ne suivent pas le chemin qui a été prévu pour elles, celles-ci frottent sur les chevilles qui les précédent ainsi que de manière trop importante sur les passages de corde. Ces frottements vont aussi détruire vos cordes très rapidement.
- Enfin, cela inverse complètement les références en termes de sens d’accordage. Ce qui va retourner le cerveau de n’importe qui voulant essayer d’accorder cet instrument.
Les cordes ne sont pas sur les bonnes chevilles
En regardant la façon dont les cordes se dirigent vers le chevillier, nous pouvons remarquer qu’elles ne sont pas ordonnées. En fait, le Sol et le Ré sont correctement placés mais le La et le Mi sont inversés. Si celles-ci étaient en place correctement, elles devraient se croiser. Cependant, les cordes ne doivent jamais se croiser et leur changement de direction doit toujours se faire de manière douce.
- Premièrement, le Sol se trouve sur la cheville la plus proche du sillet, du côté gauche en regardant de face.
- Ensuite vient la corde de Mi, positionnée à droite.
- Puis se trouve le Ré, du côté gauche.
- En dernier nous retrouvons le La, c’est la corde la plus éloignée du sillet.
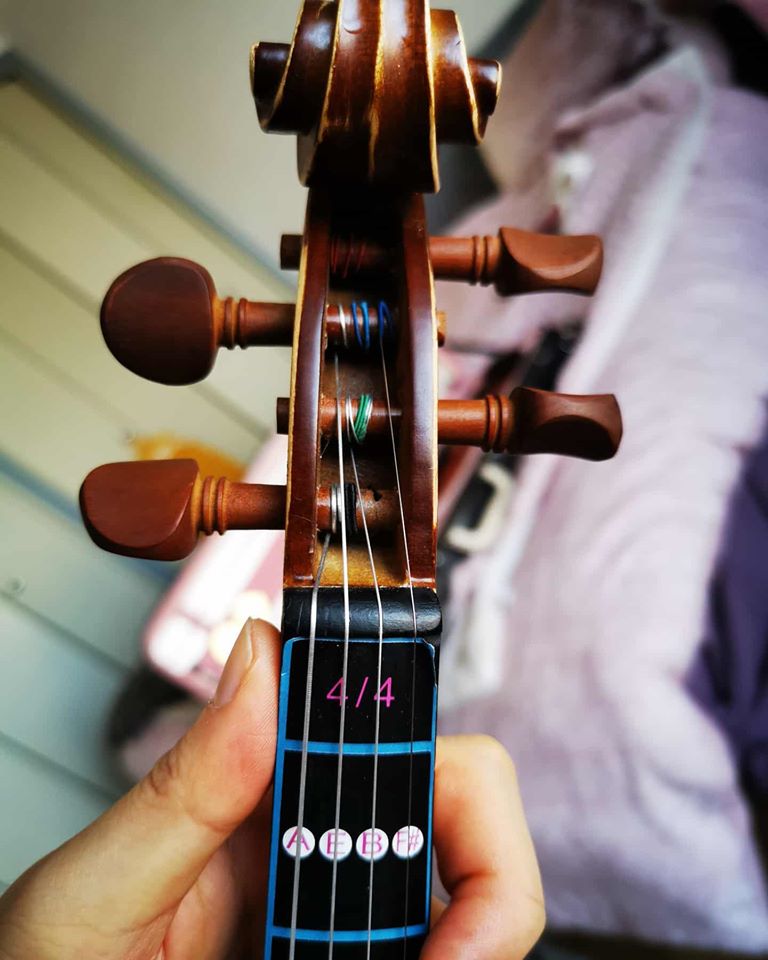
Les cordes sont mal enroulées
Il est nécessaire de positionner parfaitement la corde pour garantir une bonne longévité et un accordage stable à celle-ci. Sur la photo, il y plusieurs problèmes qu’il ne faut absolument pas reproduire :
- La corde verte est enroulée plusieurs fois sur elle même. Bien que cela soit aussi une manière de bloquer une corde qui glisse, cela représente aussi un point de faiblesse. En effet, la corde qui est tendue sur elle-même va se détériorer plus rapidement voire même rompre subitement.
- La corde bleue est enroulée dans la mauvais direction. En effet, pour fonctionner de manière optimale, la corde doit être enroulée dans la direction de la poignée de la cheville. De cette manière, elle s’alignera parfaitement avec la ligne que trace la corde depuis son point d’attache au cordier. De plus, elle devrait reposer légèrement contre la paroi afin d’empêcher la cheville de ressortir.
Pourquoi ces cordes sont mal installées
En fait, l’installation pitoyable de ces cordes n’est pas la faute du violoniste. Peut-être que celui-ci (comme beaucoup d’autres) a reçu son violon par le biais d’un magasin généraliste. L’acheteur est donc souvent la première personne à vérifier l’instrument depuis sa sortie de l’usine. C’est pourquoi celui-ci se retrouve contre son gré confronté à un assemblage d’instrument qu’il n’imaginait pas.
De ce fait et dans l’absence de toute documentation, il est normal de voir des violons, altos ou violoncelles montés de manière approximative. Car il s’agit d’une opération qui nécessite un peu de rigueur (et de connaissances) pour être parfaitement exécutée.
C’est pourquoi, même si vous achetez votre instrument en ligne, rendez visite au luthier près de chez vous. Celui-ci pourra faire l’installation correctement pour vous et éventuellement corriger quelques défauts mineurs. Et ce même s’il risque dans un premier temps d’être mécontent du fait que vous achetiez en ligne (et pas chez lui).
Mais c’est comme ça… De toute façon il est impossible de fournir un instrument qui a été pris en charge dans un atelier de lutherie au même prix que les violons à usage unique (aussi appelé « kleenex »). Enfin, pour une démarche plus responsable et économique, il serait aussi possible d’opter pour une location d’instrument.
Guide du montage de corde pour violon en vidéo
[kad_youtube url= »https://youtu.be/HcUliG05spk » width= »600″ height= »400″]
Comment bien monter les cordes de son violon
Enfin, si vous souhaitez bien monter vos cordes, j’ai écrit un article entièrement sur le sujet il y a quelques temps. Ce sera un très bon guide du montage de corde pour violon.
[blog_posts items= »1″ orderby= »date » ids= »9033″]


Bonjour,
J’adore votre blog! Merci de partager toutes ces connaissances!
La vidéo du montage des cordes est en symétrie miroir et je pense qu’il serait utile de le préciser quelque part, afin d’éviter les confusions.
Cordiales salutations